How to draw routes on Google Map with Google Maps API and Vue.js
Hello developers! Thank you for reading my article. When I developed my own application, I searched how to draw lines on Google Map with Vue. And I have manages to develop it. This article, explains about developing function to dispaly map on your web browser with Google Map API and Vue.js(or vanilla.js). I omit partially how to install vue.js and obtain Google Map API key.
Obtain Google Map API key
I omit detail to get but explain minimum requirements. At first, obtain Google Map API at Google Cloud Platform with your Google Account.
Requests for $ 200 per month are free. So you can test within the free limit. And you need Maps JavaScript API to render Google Map on the web browser.
Enable this API key and you will obtain the key code. That's all to set up for API.
Prepear Vue.js
In this time, we develop with Vue CLI. Create a project with Vue CLI.
$ vue create vue_map
Load for api sourrce file
Insert the below codes to index.html under the /public directory.
<!DOCTYPE html>
<html lang="">
  <head>
    <meta charset="utf-8">
    <meta http-equiv="X-UA-Compatible" content="IE=edge">
    <meta name="viewport" content="width=device-width,initial-scale=1.0">
    <link rel="icon" href="<%= BASE_URL %>favicon.ico">

  <!-- Insert this script -->
    <script src="http://maps.google.com/maps/api/js?key=YOUR_API_KEY&language=ja"></script>

   <title><%= htmlWebpackPlugin.options.title %></title>
  </head>
  <body>
    <noscript>
      <strong>We're sorry but <%= htmlWebpackPlugin.options.title %> doesn't work properly without JavaScript enabled. Please enable it to continue.</strong>
    </noscript>
    <div id="app"></div>
    <!-- built files will be auto injected -->
  </body>
</html>
I had tried to install API source with npm but many libraries are for node.js. So I used the outer script file from http://maps.google.com/maps/api/js. If you use it, you should load it before vue.js loaded.
The script needs the API key you get. When you use in the production, set the API configure on Google Cloud Platform as used only within your site (specific origin). If you don't that, anybody can use the key and billing just comes to YOUR credit card!
Register Google Map API as Vue plugin
After the script loaded, you can use the classes and method that operate Google Map in window.google
console.lgo(window.google);
/**
*{maps: {…}}
*/
For example, calling the api to mount a map as below.
window.google.maps.Map(document.getElementById('map'),{option});
But calling window.google.maps in every time is bothersome so let's make a plugin to call it as this.$gm.
import Vue from 'vue'
import App from './App.vue'

// THIS
Vue.prototype.$gm = window.google.maps;

Vue.config.productionTip = false
new Vue({
  render: h => h(App),
}).$mount('#app')
Preparation is completed.
Anyway lets' mount the map.
Let's mount the Google Map with vue. Write codes in App.vue.
<template>
  <div id="app" class="mt-4">
      <div id="map"></div>
  </div>
</template>

<script>
export default {
  name: 'App',
  data(){
    return{
      map:undefined,
    }
  },
  mounted(){
   const map = new this.$gm.Map(document.getElementById('map'),{
      center: { lat: 34.855273888888888, lng: 135.30649 }, //自由な緯度・経度を入力
      zoom: 10,
    });
  this.map = map;
  }
}
</script>
As the reference about Maps Class says, specify the mounted target DOM in the first argument and write the options in the second argument.
Option cantains
- center:the central coordinate when displayed the map.
- zoom:the scale of zooming. 10 is just right.
lat is the latitude and lng is the longitude. This map instance will be used to edit map so substitute to vue like this.map = map.
$ npm run serve
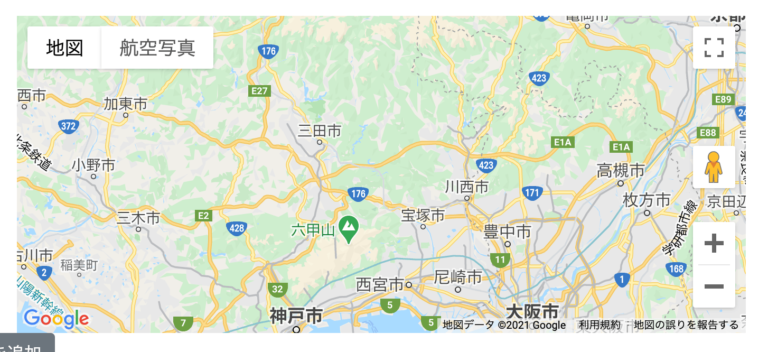
If displayed like this on the localhost, there are no problems. If you favor not to display Street View or other buttons, set the option like below.
new this.$gm.Map(document.getElementById('map'),{
      center: { lat: 34.855273888888888, lng: 135.30649 },
      zoom: 10,
      streetViewControl:false, // hide street view
      fullscreenControl:false  // hide full screen
});
Add click event to the map
You can add event listener for dragging and clicking to the Google Map. It is able to add any functions fired when user clicks the specific position or a maker. As an example, let's create a function to get the latitude and longitude of clicked position on the map.
<template>
  <div id="app" class="mt-4">
      <div id="map"></div>
      {{position}}
  </div>
</template>

<script>

export default {
  name: 'App',
  data(){
      return{
        map:undefined,
        position:undefined
      }
  },
  methods:{
   clickOnMap(mapEvent){
    console.log(mapEvent.latLng.toString())
    this.position = mapEvent.latLng.toString();
   }
  },
  mounted(){
   const map = new this.$gm.Map(document.getElementById('map'),{
      center: { lat: 34.855273888888888, lng: 135.30649 }, //自由な緯度・経度を入力
      zoom: 10,
    });

    // register event listener
    map.addListener('click',(mapsMouseEvent)=>{
      return this.clickOnMap(mapsMouseEvent);
    });

  this.map = map;
  }
}
map.addListener('click',(mapsMouseEvent)=>{...}) is similar to adding the event to DOM. Insert the callback function to the second argument. By the way, the argument of callback contains automatically the map data like clicked position coordinate.
I register the click event listener has callback executes the below method to get clicked position coordinate.
clickOnMap(mapEvent){
        console.log(mapEvent.latLng.toString())
        this.position = mapEvent.latLng.toString();
},
When clicking the map, the coordinate displayed. (ignore red point on the center..)
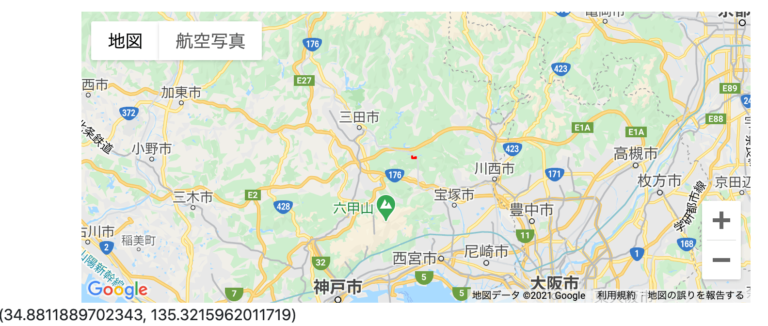
The coordinate is displayed at the under left. Anyway, it is how register an event listener and obtain data of the map.
Drawing the line.
Next, let's draw the line when clicking the map. To draw lines, you create a instance of google.maps.Polyline class and set the instance to the map instance.
You can obtain map data as above so let's draw the line when map rendered.
...
mounted(){
  const map = new this.$gm.Map(document.getElementById('map'),{
    center: { lat: 34.855273888888888, lng: 135.30649 },
    zoom: 10,
  });
  map.addListener('click',(mapsMouseEvent)=>{
    return this.clickOnMap(mapsMouseEvent);
  });
  const LINE = new this.$gm.Polyline({
      path:[
        { lat: 34.855273888888888, lng: 135.30649 },
        { lat: 34.854465, lng: 135.8 },
      ],
      geodesic: true,
      strokeColor: "#FF0000",
      strokeOpacity: 1.0,
      strokeWeight: 2,
  })
  LINE.setMap(map);
  this.map = map;
}
...
At the first, create a line instance with this.$gm.Polyline. You can set line width, path (2 points needed), color, and so on with object.
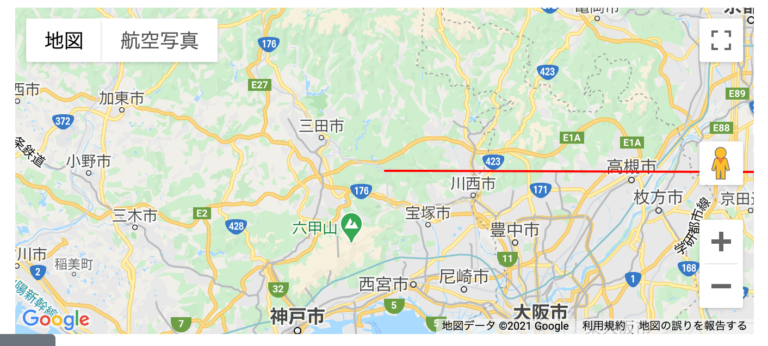
The red line is displayed. The above example is straight, but if you set detailed paths, you can draw as below.
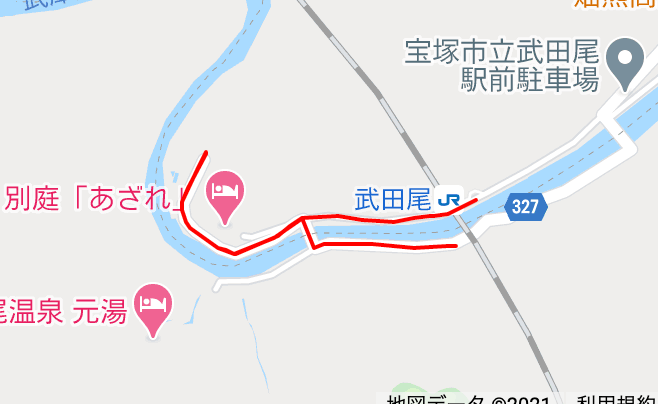
I downloaded these coordinate data from my friend's phone GPS and that has detailed data coordinate as an array.
Drawing lines with any clikced positions
Rendering the line at the initial dispaly is successful. Next, let's draw the line from point to point when the user clicked any position on the map.
You remember obtaining from click event, don't you? Applay it.
- Obtain latitude and longitude from clicked position.
- Convert them to Google Map Coordinate instance.
- Add the coordinate (path) to the line instance.
- Execute it every clicking.
drawLine method I add to click event is below.
data(){
  return{
    map:undefined,
    bounds:undefined,
    path:[],
    line:undefined
  }
},
methods:{
  drawLine(mapEvent){
    let latLng = mapEvent.latLng;

    // click 1st point
    if(this.line === undefined){
      const newLine = new this.$gm.Polyline({
        path:[latLng],
        geodesic: true,
        strokeColor: "#FF0000",
        strokeOpacity: 1.0,
        strokeWeight: 2,
      })
      newLine.setMap(this.map);
      this.path.push(latLng);
      this.line = newLine;
      return;
    }

    // click second and later point
    this.path.push(latLng);
    this.line.setPath([...this.path]);
    return;
  },
},
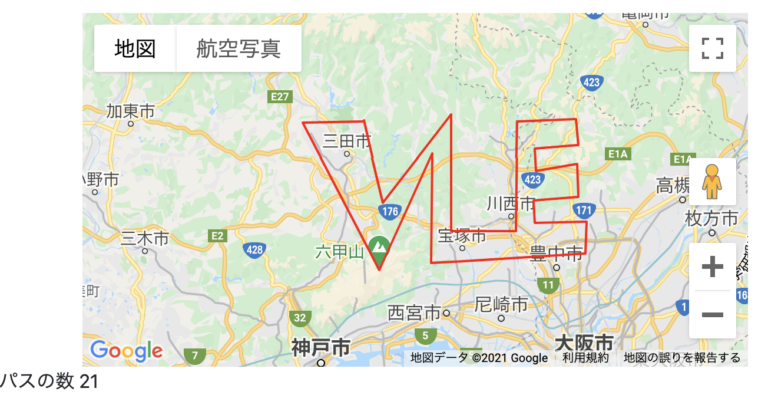
When first clicking, create the instance and store it into data(). Insert coordinate data to path every clicking. And expand the path array with this.line.setPath([...this.path]) and update instance's path. So it will draw the line from point to point with every click. I have written the character VALUE on the map with one line (^^).
If you reset the last path, that will be an undo function. If you change any path, also will be line editing function. Google Map API has many other functions to make the rich map.
Is not Vue needed??
Yes. You can make it without vue.js. Most functions are developed with Object and methods of Google map javascript api. So you can make it only with Vanilla.js. But because I have developed app with vue.js, I just used it.
Let's try othe functions!
Google Map API has any other functions. Examples, adding the maker or custom design maker and also inserting DOM element to the map. If saving these rendering data (path or maker position) as JSON and store in DB, we can create sharing map application as an example. I will try and research Google Map API. Thank you for your reading!