Vue filepondとCropper.jsの連携とファイルアップロード
こんにちはjunです。皆さんはファイルアップロードをJSで実装したことありますか?最近のwebサービスではアバターだったり、記事に画像のせるなど画像をアップロードするのが当たり前になっています。そのため仕事でもファイルのアップロード機能を実装しますが、Ajaxを用いてのFileインターフェースの扱いなどUIの構築が面倒なので、ライブラリを使っています。私はfilepondと言うものを使用して、複数アップロードやファイルのフロントバリデーションを実装します。VanillaだけでなくVue.jsやReactとの連携がしやすいので重宝しています。
今回の記事は「Filepondのアップロードを行う前にフロントでトリミングしたものをアップロードする」という単純にアップロードするだけでなく、画像を加工してからUPする機能を実装します。Line,Facebook、Twitterなどではプロフィール画像をアップロードする際に、どんな写真でも任意の範囲で1:1でトリミングできる機能があります。意外とユーザーは自身のスマホでトリミングする機能があるのを知らなかったり、機器によっては提供されていないor面倒だったりします。UX的な観点からもフロントでのトリミング機能があると便利です。
この機能を実装するにあたり、Cropper.jsのVue版を使用します。アップロードはfilepondを使用するので両者ライブラリの連携を行います。意外と苦労したので記事にしたいと思います。フロントエンド はVue CLIを用います。バックエンド側の解説はしません。バージョン情報は以下の通りです。
"devDependencies": {
    "vue": "^2.6.12",
    "vue-filepond": "^6.0.3",
},
"dependencies": {
    "filepond": "^4.30.3",
    "filepond-plugin-file-validate-type": "^1.2.6",
    "filepond-plugin-image-crop": "^2.0.6",
    "filepond-plugin-image-edit": "^1.6.3",
    "filepond-plugin-image-preview": "^4.6.10",
    "filepond-plugin-image-transform": "^3.8.7",
    "vue-cropperjs": "^4.2.0",
}
実装目標
- 任意の画像をブラウザにアップロード
- 画像を編集できるUIを用意し、任意でトリミングできる様にする
- 任意の位置、倍率でオリジナルの画像を1:1でトリミング
- トリミングした画像をサーバーにアップロードする。
以上の機能を持ったアップローダーが実装目標です。
初期設定
ではまず最初に必要なライブラリをインストールしていきましょう。とりあえず今はVue CLIの設定とfilepondだけインストールしましょう。Vue CLIのセットアップ解説は省きます。
ライブラリインストール
vue create filepond_cropper
cd filepond_cropper

npm install filepond filepond-plugin-file-validate-type filepond-plugin-image-crop filepond-plugin-image-preview --save
npm install vue-filepond@6.0.3 --save-dev
このインストールで気をつけたいのがvue-filepondのバージョンです。そのままインストールするとVue3に対応した最新版がインストールされ、Vue2系では動作しません。本家Githubでも注意書きがあります。
If you want to use Vue FilePond with Vue 2, please use v6 of this plugin.
そのため npm install vue-filepond@6.0.3 --save-devとしてバージョン6を入れる様にしてください。
Vueレンダリング準備
ライブラリのインストールが終わりましたら、最初にあるsrc/main.jsでvueでfilepondを使用できる様にします。
import Vue from 'vue'

import vueFilePond from 'vue-filepond';
import FilePondPluginFileValidateType from 'filepond-plugin-file-validate-type/dist/filepond-plugin-file-validate-type.esm.js';
import FilePondPluginImagePreview from 'filepond-plugin-image-preview/dist/filepond-plugin-image-preview.esm.js';
import FilePondPluginImageCrop from 'filepond-plugin-image-crop/dist/filepond-plugin-image-crop.esm';
const FilePond = vueFilePond(FilePondPluginFileValidateType, FilePondPluginImagePreview,FilePondPluginImageCrop);
Vue.component(FilePond);

Vue.config.productionTip = false

new Vue({
  render: h => h(App),
}).$mount('#app')
vueFilePondがあれば一応すぐに使用できますがここではfilepondのプラグインを使用します。プラグインをimportして vueFilePond()の引数に当てていきます。
FilePondPluginFileValidateTypeはファイルの拡張子を検証します。ここでは画像(jpg,png,gif)以外を許可しない様にします。FilePondPluginImagePreviewはブラウザにアップロードしたファイルをプレビューできる様にします。FilePondPluginImageCropはブラウザにアップロードしたファイルを任意のアスペクト比でトリミングしたプレビューを表示します。(実際にトリミングはしてくれない。現状はあくまでトリミング情報を提供してプレビュー表示を変えるだけ)
まずはFilepondにアップロードできるようにする
プラグインを読み込み、src/App.vueを編集します。
<template>
    <div>
        <file-pond ref="filepond" v-bind="attrs"/>
    </div>
</template>
<script>
import ja from 'filepond/locale/ja-ja';
import VueCropper from 'vue-cropperjs';
export default {
    name:'fileuploader',
    data(){
        return{
            files:[],
        }
    },
    methods:{
        onError(res){
            console.error(res)
        },
    },
    computed:{
        attrs(){
            let apiserver = '/api/v1/file/avater';
            return {
                allowMultiple:false,
                'accepted-file-types':'image/jpeg,image/png,image/gif',
                instantUpload:false,
                imageCropAspectRatio:'1:1',
                server:{
                    process: {
                        url:apiserver,
                        method: 'POST',
                        withCredentials: true,
                        onerror:(response) => this.onError(response)
                    },
                },
                ...ja
            }
        }
    },
}
</script>
上記の通りでfilepondのコンポーネント表示されます。(スタイルなどは適宜調整してください)
設定内容
filepondの公式ではテンプレートにpropsを設定していますが日本語化や色々設定が多いので、computedに記載した方がいいです。また日本語化する場合はimport ja from 'filepond/locale/ja-ja'; とインポートして展開します。
そしてこれらのpropsは本家vanilla版ドキュメントで記載されているpropertiesと同じ項目です。またfilepondのメソッドにアクセスする場合はthis.$refs.pondとrefの値を使用します。今回設定した項目の解説は以下の通りです。
return {
    // 複数ファイルのアップロードを許可するか
    allowMultiple:false,

    // 許可するmime
    'accepted-file-types':'image/jpeg,image/png,image/gif',

    // ブラウザにアップしたとき、すぐにサーバーにアップロードするか。デフォルトはTrueなので注意
    instantUpload:false,

    // FilePondPluginImageCrop有効時のアスペクト比。
    imageCropAspectRatio:'1:1',

    // アップロードする際のajaxの設定
    server:{
        // アップロードするときの設定
        process: {
            // アップロード先URL
            url:apiserver,

            // アップロードのメソッド(processはデフォルトでPOST)
            method: 'POST',

            // withCredentialsを有効化
            withCredentials: true,

            // エラー時のコールバック
            onerror:(response) => this.onError(response)
        },
    },

    // 日本語化
    ...ja
}
ひとまず上記の設定があり、サーバー側でURLが利用可能であれば一応アップロードが可能です。ただしこれだけではトリミングされません。(プレビューはトリミングされて表示されますが)
instantUploadはデフォルトでtrueであり、トリミング前にアップロードされますので注意が必要です。
Filepondとvue-cropperへの連携
ではアップロードはできたのでcropperと連携しましょう。新しくライブラリをインストールします。
npm install filepond-plugin-image-edit filepond-plugin-image-transform vue-cropperjs --save
cropperのVue版とfilepondの編集APIとトリミングしてくれるプラグインをインストールします。main.jsも変更します。
import vueFilePond from 'vue-filepond';
import FilePondPluginFileValidateType from 'filepond-plugin-file-validate-type/dist/filepond-plugin-file-validate-type.esm.js';
import FilePondPluginImagePreview from 'filepond-plugin-image-preview/dist/filepond-plugin-image-preview.esm.js';
import FilePondPluginImageCrop from 'filepond-plugin-image-crop/dist/filepond-plugin-image-crop.esm';
import FilePondPluginImageEdit from 'filepond-plugin-image-edit/dist/filepond-plugin-image-edit.esm'; // 追加
import FilePondPluginImageTransform from 'filepond-plugin-image-transform/dist/filepond-plugin-image-transform.esm'; // 追加
const FilePond = vueFilePond(FilePondPluginFileValidateType, FilePondPluginImagePreview,FilePondPluginImageCrop,FilePondPluginImageEdit,FilePondPluginImageTransform);
Vue.component(FilePond);
編集UIの表示
まず編集ボタンを表示できる様にします。先程のfilepondの設定に編集用コールバックの設定を追加します。
<script>
// 部分省略
export default {
    name:'fileuploader',
    data(){
        return{
            files:[],
        }
    },
    methods:{
        // ...
    },
    computed:{
        // 追加
        editor(){
            return {
                // Called by FilePond to edit the image
                // - should open your image editor
                // - receives file object and image edit instructions
                open: (file, instructions) => {
                // open editor here

                },

                // Callback set by FilePond
                // - should be called by the editor when user confirms editing
                // - should receive output object, resulting edit information
                onconfirm: (data) => {},

                // Callback set by FilePond
                // - should be called by the editor when user cancels editing
                oncancel: () => {},

                // Callback set by FilePond
                // - should be called by the editor when user closes the editor
                onclose: () => {
                },
            }
        },
        attrs(){
            let apiserver = '/api/v1/file/avater';
            return {
                imageEditEditor:this.editor, // 追加
                allowMultiple:false,
                'accepted-file-types':'image/jpeg,image/png,image/gif',
                instantUpload:false,
                imageCropAspectRatio:'1:1',
                server:{
                    process: {
                        url:apiserver,
                        method: 'POST',
                        withCredentials: true,
                        onerror:(response) => this.onError(response)
                    },
                },
                ...ja
            }
        },
        // ...
    },
}
</script>
editorというプロパティーを追加しました。そしてfilepondの設定にimageEditEditorを追加して、editorを参照する様にします。このimageEditEditorがないと編集UIが出現しません。editorの雛形は本家ドキュメントから参照できます。
imageEditEditorをしますと下図の赤矢印の様に編集ボタンが出現します。
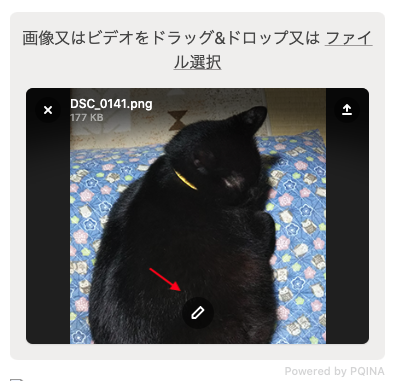
この編集ボタンをクリックした際はeditorのopen()=>{}コールバックが実行されます。この際にcropperに画像データを渡し、起動する様にすればトリミングUIを表示できる様になります。
cropperのレンダリング
設定の前にfilepondのコンポーネントを表示する様にします。
<template>
<div>
    <file-pond v-bind="attrs"/>
    <vue-cropper
        ref="cropper"
        :src="imgSrc"
        :aspect-ratio="1 / 1"
        :view-mode="1"
    >
    </vue-cropper>
    <button variant="primary" @click="crop">crop</button>
</div>
</template>
<script>
import ja from 'filepond/locale/ja-ja';
import VueCropper from 'vue-cropperjs';  // 追加
export default {
    name:'fileuploader',
    data(){
        return{
            files:[],
            imgSrc:'', // 追加
        }
    },
    methods:{
        onError(res){
            // ...
        },
        crop(){
            // 追加
            // とりあえずこのままにしておいてください。
        }
    },
    computed:{
        // ...
    },
    components:{
        VueCropper // 追加
    }
}
</script>
import VueCropper from 'vue-cropperjs';にてvue-cropperのコンポーネントを配置します。vue-cropperはトリミングのUIを提供し、buttonはトリミングの実行を行ってfilepondにデータを渡すメソッドに連絡します。
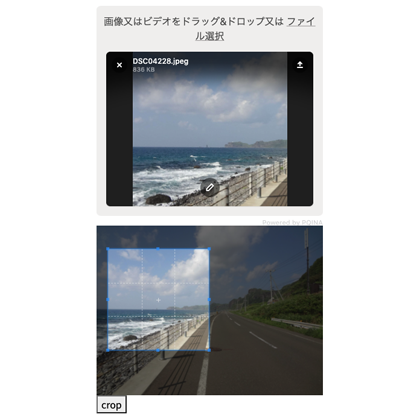
ひとまず以下の様に表示されると思います。
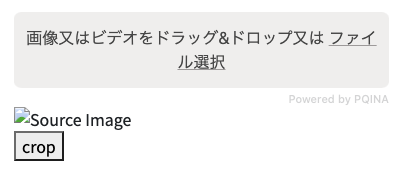
なおvue-cropperのコンポーネントに設定した項目は以下の通りです。
aspect-ratio:トリミングUIのアスペクト比です。view-mode:ビューモードと呼ばれるトリミングの選択範囲を制御できます。デフォルトは0であり制限がなく、透明の領域までトリミングできてしまします。詳しくはそれぞれ設定してみて挙動を確認してください。
filepondからcropperへ画像を渡す
それでは編集ボタンを押したらvue-cropperへ画像を渡す様にしましょう。実際のサービスではモーダルなどを出したりした方がいいかもしれませんが、面倒なので今はそのまま表示します。editorをのopenコールバックを編集します。
editor(){
    return {
        // Called by FilePond to edit the image
        // - should open your image editor
        // - receives file object and image edit instructions
        open: (file, instructions) => {
        // open editor here
            const objectURL = URL.createObjectURL(file)
            this.imgSet =objectURL;
            this.$refs.cropper.replace(objectURL);
        },
},
openコールバックは2つの引数があり、fileはアップロードされたFileオブジェクトです。instructionsは編集する前のfilepondの編集情報です。fileオブジェクトからURL.createObjectURL(file)を使用することでブラウザアップロード(filepond)された画像をURLで参照できる様になります。そしてimgSrcに代入し、そしてcropper.replace(objectURL);を使用してトリミングの画像を差し替えます。
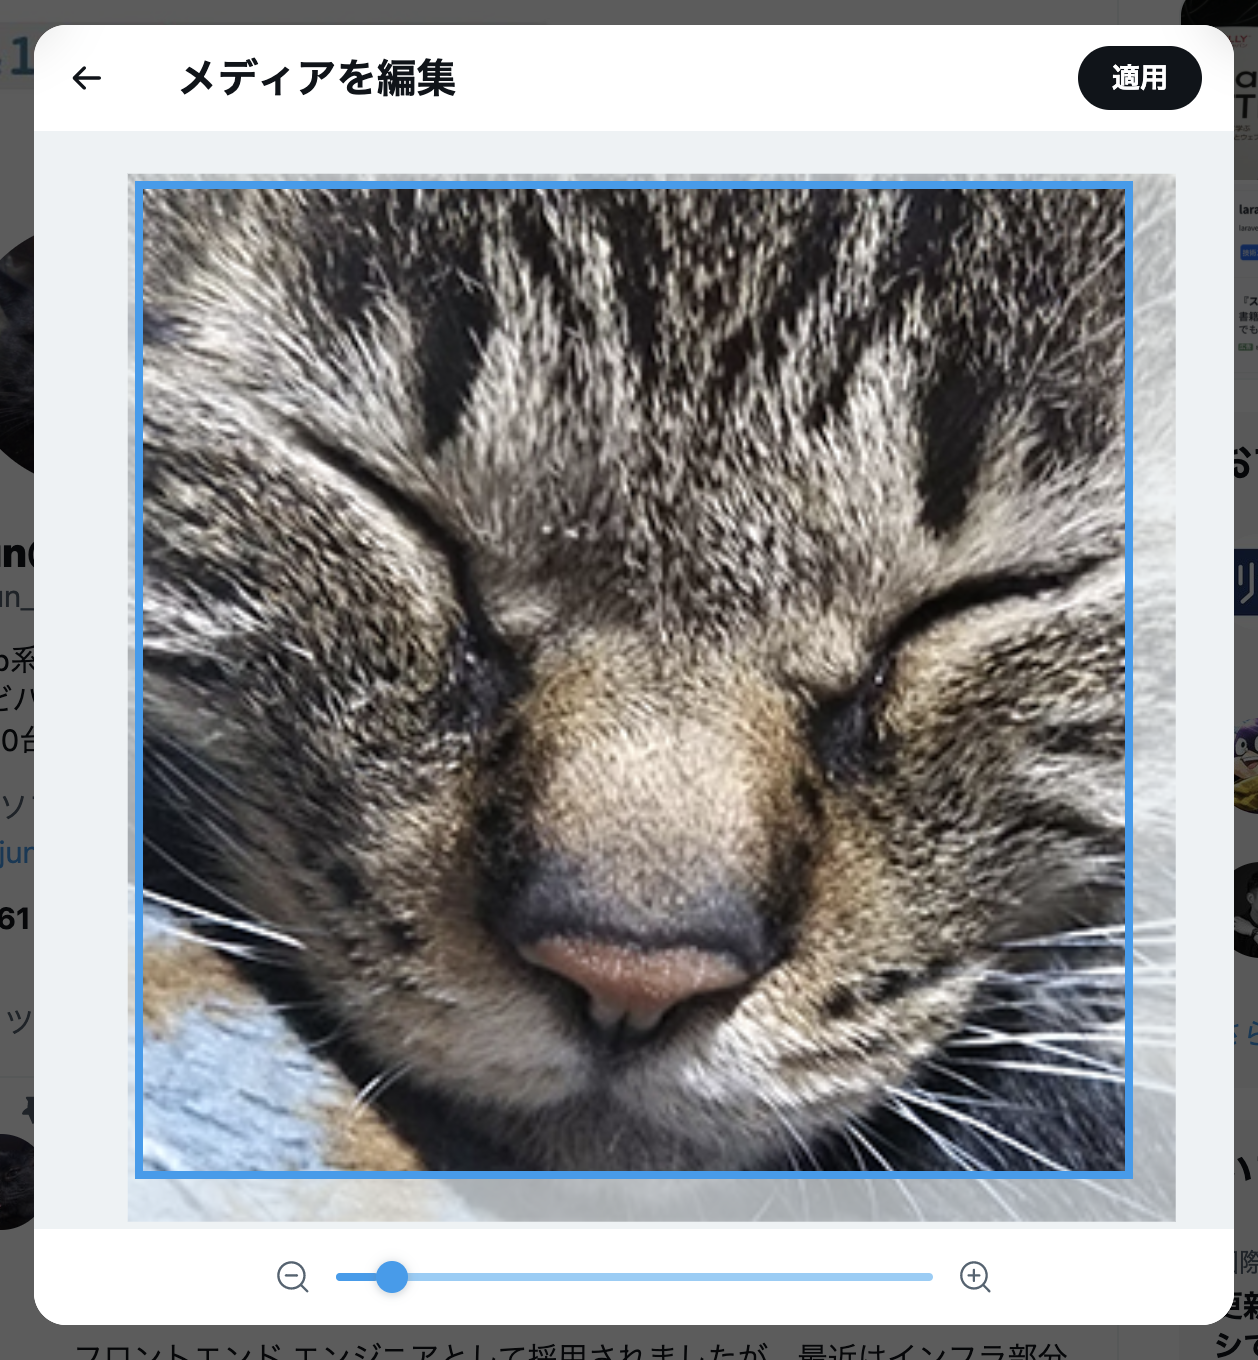
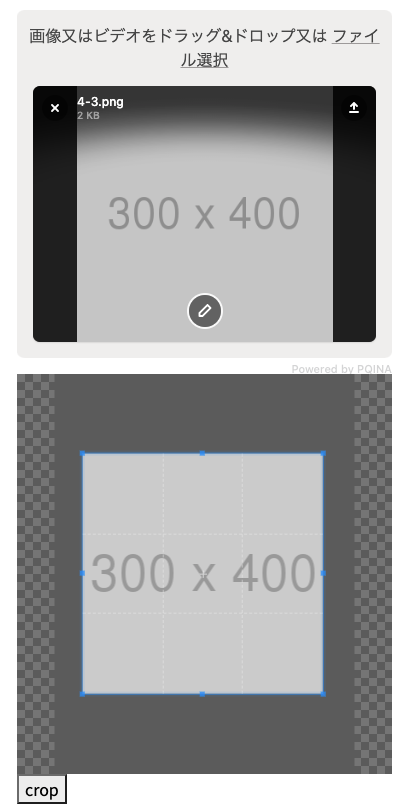
上記の様に編集して、編集ボタンを押すとトリミングUIが表示される様になり、任意のトリミング位置を設定できる様になります。
cropperからfilepondへ情報を渡す
トリミングUIでは任意の範囲と位置を設定できます。トリミングした画像をfilepondに適用するためには、vue-cropperで選択したトリミングの位置や範囲などのオブジェクトをfilepondに渡すことで実現できます。(cropperで画像を加工するわけではない!)
データを渡すときはeditorのonconfirmコールバックを利用します。vue-cropperでトリミングした際にコールバックを呼び出します。
<template>
<div>
    <file-pond v-bind="attrs"/>
    <vue-cropper
        ref="cropper"
        :src="imgSrc"
        :aspect-ratio="1 / 1"
        :view-mode="1"
    >
    </vue-cropper>
    <button variant="primary" @click="crop">crop</button>
</div>
</template>
<script>
import ja from 'filepond/locale/ja-ja';
import VueCropper from 'vue-cropperjs';  // 追加
export default {
    name:'fileuploader',
    data(){
        return{
            files:[],
            imgSrc:'', // 追加
        }
    },
    methods:{
        onError(res){
            // ...
        },
        crop(){
            // 追加
            this.editor.onconfirm()
        }
    },
    computed:{
        editor(){
            return{
                // ...
                onconfirm: (data) => {},
                // ...
            }
        }
    },
    components:{
        VueCropper // 追加
    }
}
</script>
この時onconfirmに渡すデータは以下の様に定義する必要があります。
{
    data: {
        // This is the same as the instructions object
        crop: {
            center: {
                x: .5,
                y: .5
            },
            flip: {
                horizontal: false,
                vertical: false
            },
            zoom: 1,
            rotation: 0,
            aspectRatio: null
        }
    }
}
このデータはeditorのopen(file, instructions)コールバックのinstructionsと同じ構造です。filepondはこのinstructionsの値を変更することで、プレビューの画像表示や実際にアップロードする画像のトリミングなどが実行されます。
そのためvue-cropperのトリミングによる座標位置や、トリミング範囲上記のデータに合わせて設定する必要があります。vue-cropperにはgetCanvasData()やgetData()などのメソッドがあるため、それらを用いてvue-cropperのデータをコールバックを通してfilepondへ渡します。
計算を行う
しかしfilepondに渡すデータは結構クセがあり、cropperから取得できる情報の何をどこに当てはめればいいのかわかりません。github issueにてcropper.jsとの連携に関するissueを発見し、今回はその値を用いることにします。crop()を以下の様に変更します。
crop(){
    // https://github.com/pqina/filepond-plugin-image-edit/issues/1
    /* Constants. */
    const canvasData = this.$refs.cropper.getCanvasData() // Cropperjs method getCanvasData()
    const cropData = this.$refs.cropper.getData() // Cropperjs method getData()

    /* Ratio of selected crop area. */
    const cropAreaRatio = cropData.height / cropData.width

    /* Center point of crop area in percent. */
    const percentX = (cropData.x + cropData.width / 2) / canvasData.naturalWidth
    const percentY = (cropData.y + cropData.height / 2) / canvasData.naturalHeight

    /* Calculate available space round image center position. */
    const cx = percentX > 0.5 ? 1 - percentX : percentX
    const cy = percentY > 0.5 ? 1 - percentY : percentY

    /* Calculate image rectangle respecting space round image from crop area. */
    let width = canvasData.naturalWidth
    let height = width * cropAreaRatio
    if (height > canvasData.naturalHeight) {
    height = canvasData.naturalHeight
    width = height / cropAreaRatio
    }
    const rectWidth = cx * 2 * width
    const rectHeight = cy * 2 * height

    /* Calculate zoom. */
    const zoom = Math.max(rectWidth / cropData.width, rectHeight / cropData.height)
    this.editor.onconfirm({
    data: {
        crop: {
            center: {
                x: percentX,
                y: percentY
            },
            flip: {
                horizontal: cropData.scaleX < 0,
                vertical: cropData.scaleY < 0
            },
            zoom: zoom,
            rotation: (Math.PI / 180) * cropData.rotate,
            aspectRatio: cropAreaRatio
        }
    }
    })
}
アップロードを行う
これでvue-cropperのトリミング情報をfilepondに渡すことができる様になりました。実際にトリミング範囲を指定してcropボタンをクリックしますと、その位置と範囲にしたがってトリミングされた範囲がプレビューされます。
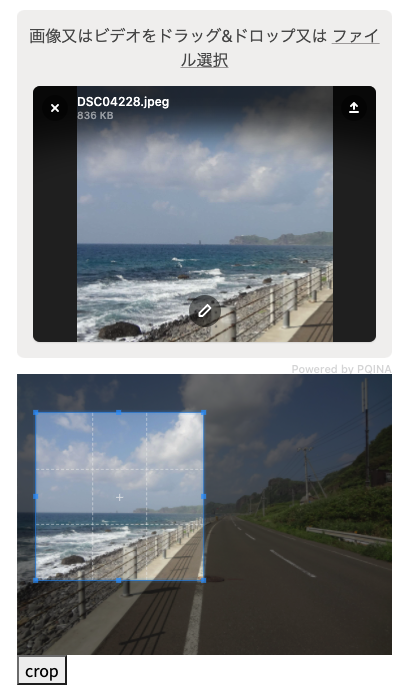
そして最後にアップロードボタンをクリックすると渡されたデータを元に、filepondが元画像のトリミングを行いアップロードします。トリミングしてもらうためにはFilePondPluginImageTransformがインストールされ、有効になっている必要があります。サーバー側では1:1にトリミングされた画像を確認することができます。
まとめ
filepondは主にブラウザアップロードと実際のトリミング処理を行います。そしてトリミング箇所の指定は別のライブラリを用いて実装する必要があります。filepondはDoka Image Editorという有償ライブラリとの互換性を第一にしているそうで、cropper.jsとの連携と特に計算が方法がわかりませんでした。ひとまず上記の方法でトリミングとアップロード機能が実装できました。後はUIを整えてあげれば完成です。